
所需条件
- 运行Ubuntu 20.04(优先)的VPS及root/sudo权限。
- 服务商网络参数:IP/前缀和默认网关;请提前记录。
- 若注册后网络仍不可用,需通过服务商控制面板访问应急控制台(VNC/串行)。
在重写硬盘前(强制要求)务必检查并记录网络配置。
此步骤需在重写硬盘并安装MikroTik CHR之前完成。写入RAW镜像后,当前Ubuntu系统将被完全清除,SSH访问权限消失,此时仅能通过紧急控制台手动使用预先记录的参数在CHR中配置网络。因此,继续操作前务必记录供应商提供的网络参数。
需记录哪些数据?
- IP地址与掩码(前缀)
示例:203.0.113.10/24
此值用于向CHR添加IP地址。
- 默认网关
示例:203.0.113.1
此地址用于配置默认路由。
- 网络类型:常规或/32
若IP地址采用/32掩码分配(VPS供应商常见),则需进行特殊CHR配置。
/32网络示例:
- IP:85.85.85.85/32
- 网关:10.0.0.1
此类网络中,添加IP地址时需手动指定网关。
					sudo -i
ip -c a
ip -c r
准备Ubuntu并修正网络参数
					sudo -i
apt update && apt -y install unzip
ip -c a   # record your IP/prefix, for example 203.0.113.10/24
ip -c r   # write down the default gateway, for example 203.0.113.1
这在重启后通过控制台配置CHR时会很有用。
下载托管在云端的路由器RAW映像。
					cd /tmp
wget https://download.mikrotik.com/routeros/<VER>/chr-<VER>.img.zip
unzip chr-<VER>.img.zip   # we will receive chr-<VER>.img
其中<VER>对应稳定版本。若最新版本无法加载,请使用6.49.10版本,随后通过CHR执行更新。
定义目标硬盘。
					fdisk -l
# For example, the target disk /dev/sda
注意:请确保选择正确的设备,因为此操作具有破坏性。
将文件系统转换为只读模式
					echo u > /proc/sysrq-trigger
sync
这可降低使用dd时镜像文件“损坏”的风险(曾有案例显示使用xz压缩的数据会损坏)。
将镜像写入硬盘(dd)。
dd if=chr-<VER>.img of=/dev/sda bs=4M oflag=sync status=progress
请等待过程无错误完成。这将彻底清除您当前的Ubuntu系统。
强制重启CHR
					echo 1 > /proc/sys/kernel/sysrq
echo b > /proc/sysrq-trigger
SSH连接中断。VPS在CHR中以默认状态启动:尚未有可用网络。
首次连接紧急控制台
- 在供应商面板中打开紧急控制台。
- 管理员登录,密码为空 → 确认许可证显示 → 立即设置新密码。
- 最新型号/版本可能具有其他默认参数,但对于CHR,典型场景是首次连接时管理员无密码。
在RouterOS(CLI)中配置IP地址
在RouterOS控制台(菜单式CLI)中:
					ip
address
add
address=203.0.113.10/24
interface=ether1
RouterOS根据前缀计算网络/传输;地址也可添加到单行中:
/ip address add address=203.0.113.10/24 interface=ether1
/32 掩码情况(云环境中常见)
若供应商分配的公共 IP 地址采用 /32 掩码及“外部”网关(例如 10.0.0.1),请手动配置网络:
/ip address add address=85.85.85.85/32 interface=ether1 network=10.0.0.1
以下是标准路线:
/ip route add gateway=10.0.0.1
这是一份针对/32的标准工作方案,已在实践中证明其有效性。
标准路径
简写形式:
/ip route add gateway=203.0.113.1
配置完地址和网关后,即可通过网络访问CHR。
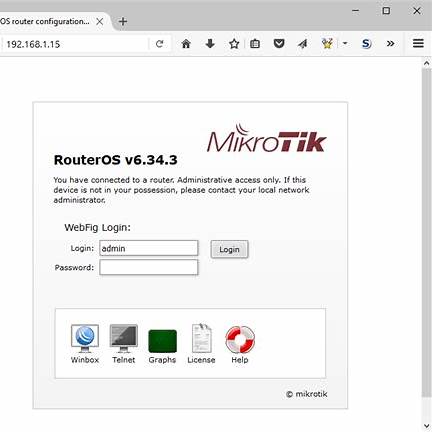
访问WebFig/Winbox
- 打开http://<IP>访问WebFig(若启用HTTPS则访问https://<IP>)。
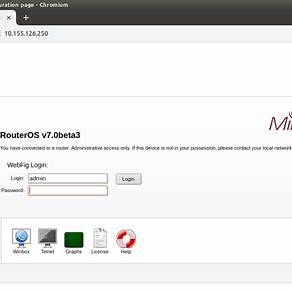
- 您也可以连接到 Winbox(标准TCP端口 8291)。
- 管理员标识符 + 您的新密码。
网络配置完成后应立即采取哪些措施?
基础安全设置(禁用非必要服务,修改服务端口)
					/ip service print
/ip service set telnet disabled=yes
/ip service set ftp disabled=yes
/ip service set www disabled=yes         # enable www-ssl instead of plain-HTTP
/ip service set api disabled=yes
/ip service set api-ssl disabled=yes
/ip service set ssh address=0.0.0.0/0    # narrow if necessary
/ip service set winbox port=8291         # change the port if desired
WebFig 和 Winbox 在功能上是类似的管理工具。默认情况下,WebFig 使用 HTTP 协议连接 80 端口(建议启用 HTTPS),而 Winbox 使用 TCP 8291 端口。
为 WebFig 启用 HTTPS:
					/user add name=ops group=full password="ComplexPassword123!"
/user disable admin
用户名和密码
					/ip service set www disabled=yes
/ip service set www-ssl disabled=no certificate=<yours-cert>
(或退出管理员模式,但需设置复杂密码并限制IP地址访问)
时间与NTP
					/system clock set time-zone-name=Etc/UTC
/system ntp client set enabled=yes servers=pool.ntp.org
基础NAT(若为您的“互联网路由器”)
/ip firewall nat add chain=srcnat out-interface=ether1 action=masquerade
小型防火墙用于管理
					/ip firewall filter
add chain=input connection-state=established,related action=accept
add chain=input connection-state=invalid action=drop
add chain=input protocol=tcp dst-port=22,8291,443,80 src-address-list=mgmt action=accept
add chain=input in-interface=ether1 action=drop comment="drop rest from WAN"

/ip firewall address-list
add list=mgmt address=203.0.113.0/24
CHR更新与许可
检查并更新RouterOS:
					/system package update check-for-updates
/system package update install
验证CHR许可证:
/system license print
(生产负载请选择 p1/p10/p-unlimited;详见官方 CHR 章节)。
调试:常见问题
- dd 操作后出现「xz 压缩数据损坏 / 系统停止」
- 常见原因是写入「活动」文件系统。在执行 dd 之前将文件系统设为只读状态通常有效。若遇到问题,请使用6.49.10版本启动系统,随后升级至7.x版本。
- 重启后无法ping通
- 请确认已在CHR中设置地址和网关(步骤8-9)。对于/32地址,添加地址时需指定network=<gateway>,并设置路由gateway=<gateway>。
- +WebFig/Winbox无法打开
- 请通过紧急控制台连接,检查/ip service print、防火墙设置及端口是否正确(Winbox为8291/TCP)。
补充:快速配置表
通过DHCP连接(若云端动态分配地址)
/ip dhcp-client add interface=ether1 use-peer-dns=yes use-peer-ntp=yes
(对于服务器环境,建议使用静态地址)。
桥接(如果CHR中有多个接口)
					/interface bridge add name=br0
/interface bridge port add bridge=br0 interface=ether1
/ip address add address=192.0.2.10/24 interface=br0
VLAN在接口上
					/interface vlan add name=wan.100 vlan-id=100 interface=ether1
/ip address add address=203.0.113.10/24 interface=wan.100
/ip route add gateway=203.0.113.1


