This guide walks you through a clean SQL Server 2019/2022 installation on a Windows VPS, with practical best practices: disk layout (data/log/backup), service accounts, tempdb planning, network access (TCP/IP + port), firewall rules, and post-install validation.
For stable SQL performance, choose a reliable Windows VPS and consider plans from our VPS hosting lineup that offer enough RAM and fast storage for database workloads.
Practical sizing note: SQL Server is memory- and I/O-sensitive. For production workloads, prioritize RAM and storage latency over raw CPU cores.
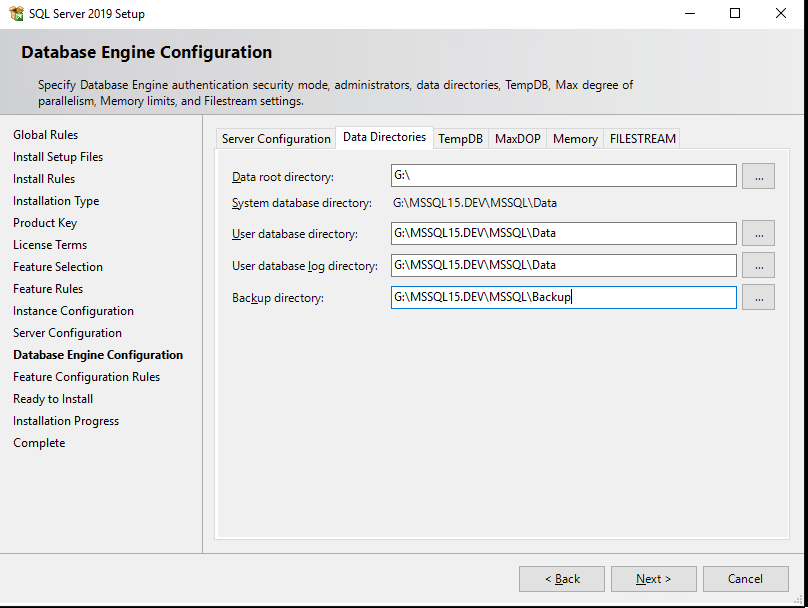
A common best practice is to separate directories (ideally different volumes):
D:SQLDataE:SQLLogsF:SQLBackupsT:TempDBCreate directories (edit drive letters to match your VPS):
New-Item -ItemType Directory -Path D:SQLData -Force
New-Item -ItemType Directory -Path E:SQLLogs -Force
New-Item -ItemType Directory -Path F:SQLBackups -Force
After installation, grant NTFS rights to the SQL Server service account(s) on these folders if you use custom accounts. (Many installs use virtual accounts by default; permissions are typically handled by setup.)
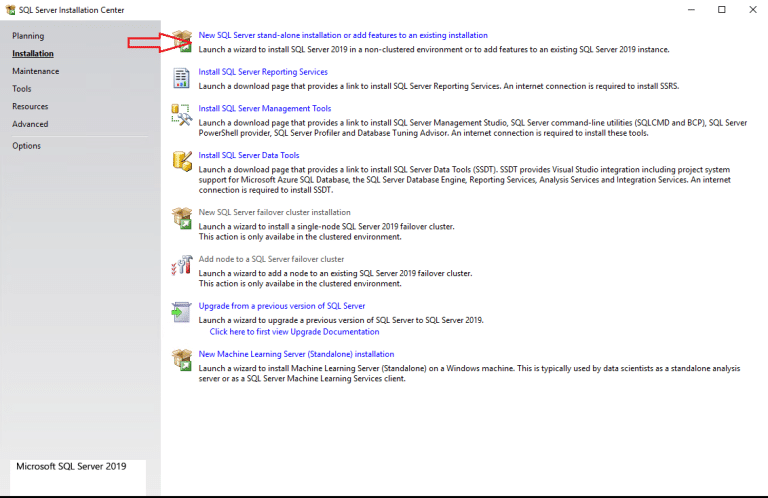
Mount/open the SQL Server ISO → run setup.exe → Installation → New SQL Server stand-alone installation.

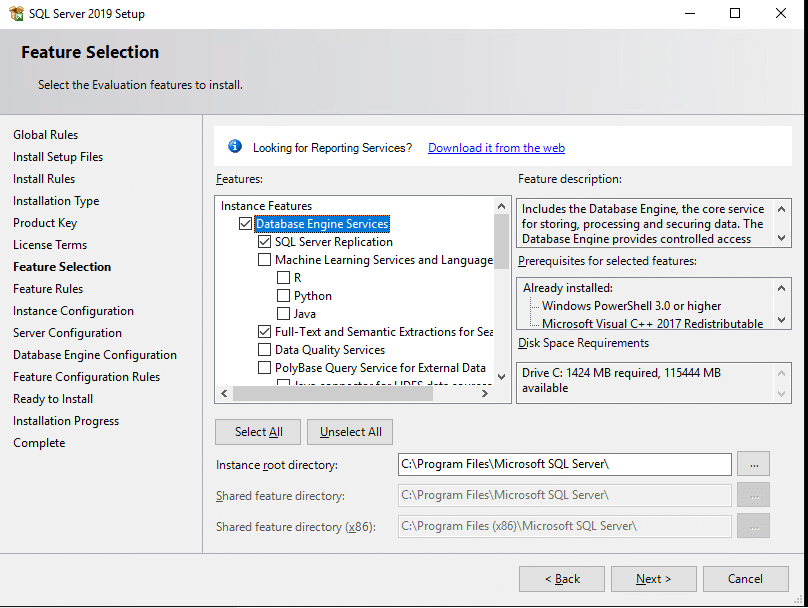
Minimum for most servers: Database Engine Services. Add features only if you really need them (Replication, Full-Text, SSIS, etc.). Keeping the footprint small reduces complexity and attack surface.
Choose:
MSSQLSERVER) — simplest for most cases.DEV) — useful if you run multiple SQL instances on one VPS.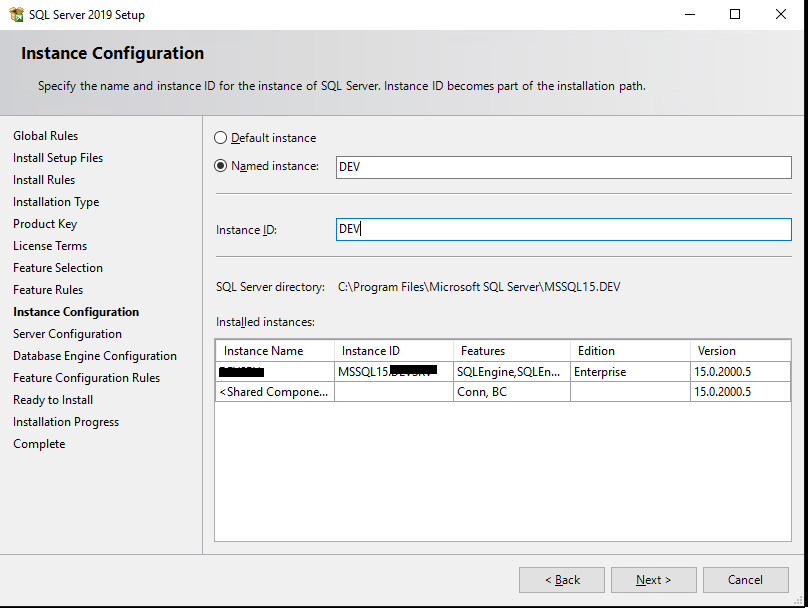
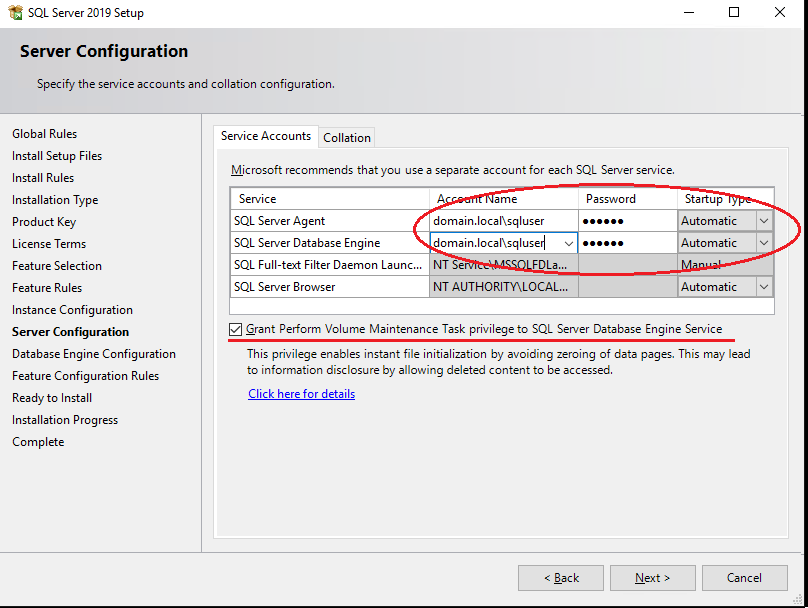
The installer may offer Grant Perform Volume Maintenance Task — this enables Instant File Initialization (IFI), which can speed up data file creation/growth. IFI is commonly used in production, but follow your security policy (it can expose remnants of previously deleted data on the same volume until overwritten).
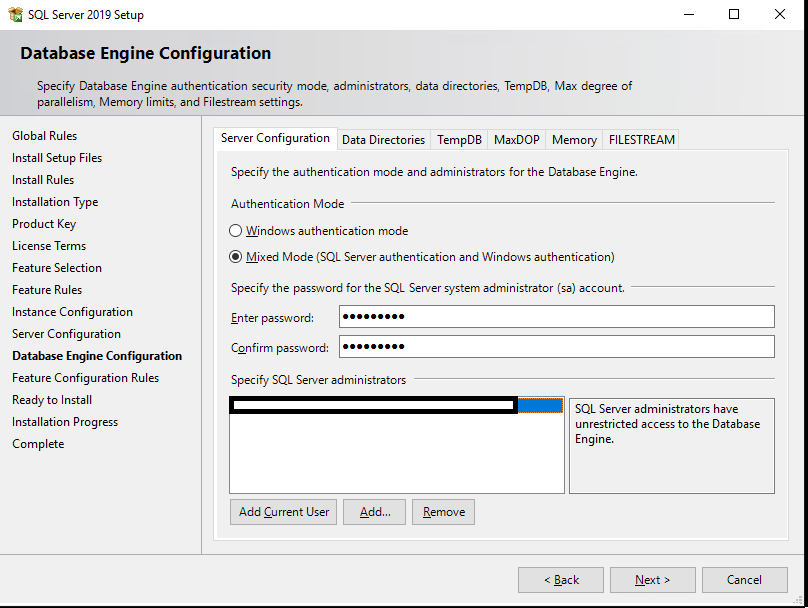
Prefer Windows Authentication when possible. If your application requires it, you can enable Mixed Mode (Windows + SQL logins). If Mixed Mode is enabled, set a strong sa password and limit its usage.
Point SQL Server to your planned directories (data, logs, backups). This helps performance and simplifies maintenance/backup routines.
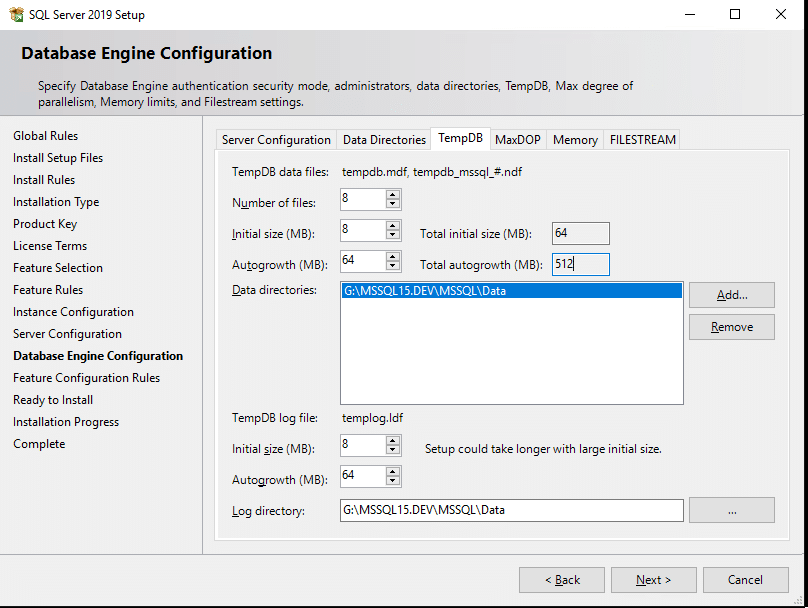
TempDB performance affects many workloads. A common starting point:
Complete the setup wizard. For management, install SQL Server Management Studio (SSMS) on the VPS or on your admin workstation and connect remotely.
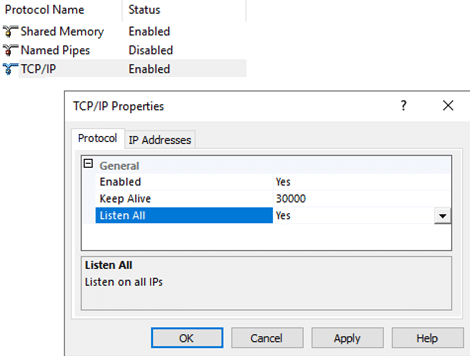
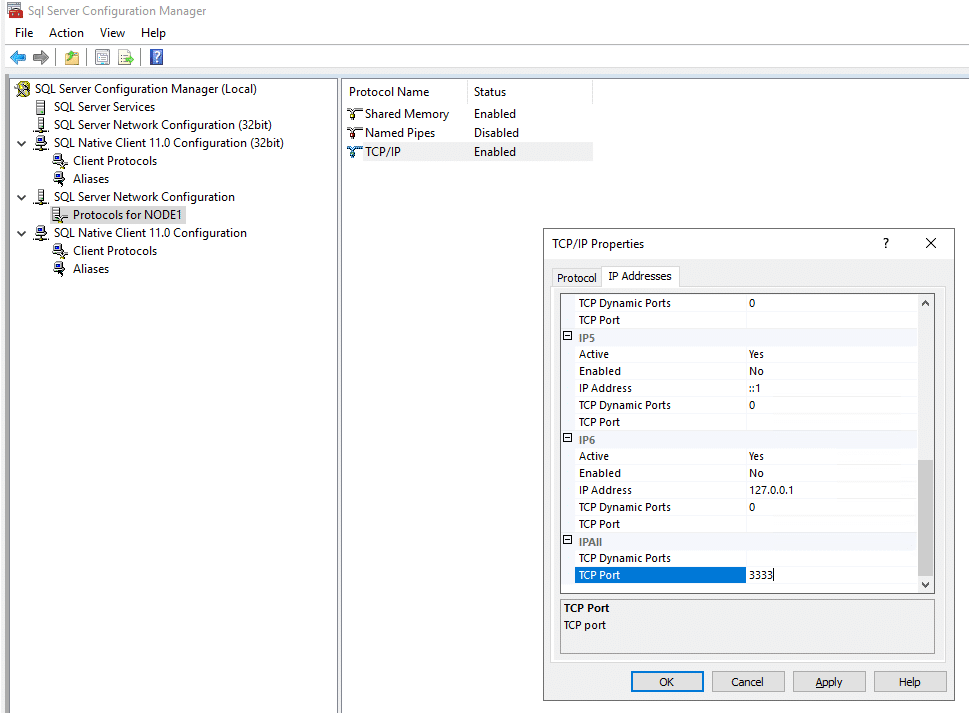
Open SQL Server Configuration Manager → SQL Server Network Configuration → Protocols for your instance → enable TCP/IP.
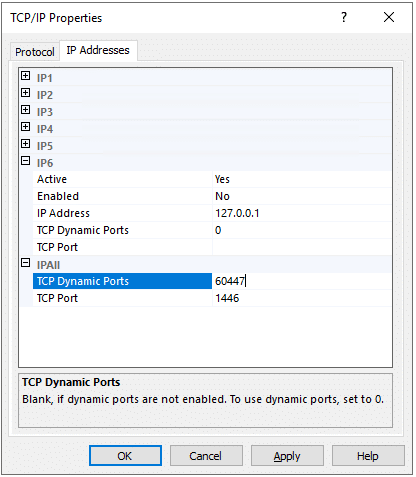
Set a static port (commonly 1433, or a custom port) in TCP/IP properties → IP Addresses tab → IPAll section:
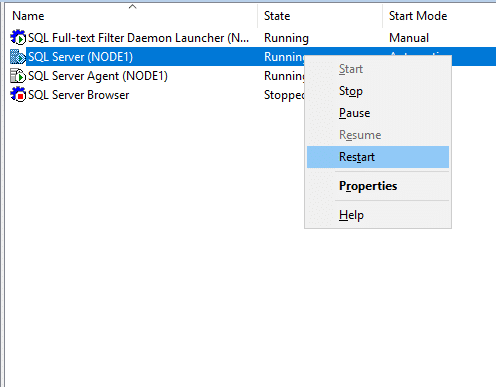
Restart the SQL Server service for changes to apply:
Note: If you keep dynamic ports (often on named instances), clients may require SQL Server Browser service (UDP/1434). For most production deployments, a static port is simpler and easier to firewall.
Allow inbound connections to your SQL Server TCP port. If you use SQL Browser for dynamic ports, allow UDP/1434 (only if truly needed).
Example PowerShell rules (replace port and optionally restrict by RemoteAddress):
# Replace 1433 if you use a custom port
New-NetFirewallRule -DisplayName "SQL Server (TCP 1433)" -Direction Inbound -Protocol TCP -LocalPort 1433 -Action Allow

# Optional: restrict to known IPs/networks (recommended for security)
# New-NetFirewallRule -DisplayName "SQL Server (TCP 1433) - Office" -Direction Inbound -Protocol TCP -LocalPort 1433 -RemoteAddress 203.0.113.10/32 -Action Allow

# SQL Server Browser (only if you use dynamic ports and need it)
New-NetFirewallRule -DisplayName "SQL Server Browser (UDP 1434)" -Direction Inbound -Protocol UDP -LocalPort 1434 -Action AllowFrom a client/jump host (PowerShell):
# Default port example
Test-NetConnection YOUR_VPS_HOSTNAME_OR_IP -Port 1433

# Custom port example
Test-NetConnection YOUR_VPS_HOSTNAME_OR_IP -Port 51433
In SSMS, connect using:
HOSTNAMEHOSTNAME,1433HOSTNAMEINSTANCE,51433Basic SQL checks:
SELECT @@VERSION AS version;

EXEC sp_configure 'show advanced options', 1;
RECONFIGURE;

EXEC sp_configure; -- review current settingsThese settings depend on workload, but many production deployments set:
Example commands (adjust values to your VPS and workload):
EXEC sp_configure 'show advanced options', 1;
RECONFIGURE;

-- Example: set MAXDOP to 8
EXEC sp_configure 'max degree of parallelism', 8;
RECONFIGURE;

-- Example: raise cost threshold (common starting point)
EXEC sp_configure 'cost threshold for parallelism', 50;
RECONFIGURE;sqlservr.exe where appropriate.sa password is strong (if Mixed Mode is enabled).SQL Server needs stable disk latency and enough RAM. Choose a reliable Windows VPS or explore our VPS hosting plans to deploy MS SQL Server with predictable performance and clean network/security controls.