Skip to content
 The Zabbix server is used to collect and analyze information about the status of network nodes. In this article the process of installing and deploying a web interface to manage it will be considered. We will use MariaDB/MySQL as the database server. The version of the operating system that was used to write the instructions is 20.04 LTS (also tested on 22.04), the version of Zabbix being installed is 6.
Server preparation
- Time
- Firewall
The web server installing
- MariaDB
- nginx
- PHP + PHP-FPM
- NGINX + PHP
Zabbix server installing
- Installation
- Database setup
- Setting up zabbix
- Starting zabbix-server
- Setting up nginx
- Installing the Management Service
Setting Zabbix agent up on the server
Other instructions for Zabbix
Server preparation
Before installing Zabbix, we carry out preparatory procedures.
To start let’s do this
1. Accurate time
To get up-to-date information, it is necessary that the server has the accurate time.
To do this, first set the precise time zone:
timedatectl set-timezone europe/berlin
* In this example, Berlin time is set.
Then install and start the time synchronization service:
apt install chrony
systemctl enable chrony
systemctl start chrony
2. Firewall settings
For the access to Zabbix server,open the following ports:
iptables -I INPUT -p tcp –match multiport –dports 80,443 -j ACCEPT
iptables -I INPUT -p tcp –match multiport –dports 10050,10051 -j ACCEPT
iptables -I INPUT -p udp –match multiport –dports 10050,10051 -j ACCEPT
* where 80 is the port for http requests (web interface); 443 – for https requests (web interface); 10050 – ports for receiving information from zabbix agents.
To save the rules, use
apt install iptables-persistent
netfilter persistent save
3. Update the list of packages in the repository:
apt update
If our system is clean and critical services are not running on it, it is worth updating the installed packages:
apt upgrade
System preparation is completed.
Web server installation
The Zabbix server will be managed through a web interface. To do this, you need to install and configure a web server, DB and PHP.
MariaDB
In this tutorial, we will use the MariaDB database server. Zabbix version 6 requires MariaDB version 10.05.00 and higher. But a too recent version may also not be supported by the zabbix server. It is necessary to clarify the system requirements on the official page.
The Ubuntu repository may not contain the required version of the MariaDB, so we will connect the developer’s repository. To do this, follow the link downloads.mariadb.org/mariadb/repositories and select our version of the operating system, the latest stable and supported release of MariaDB and the geolocation of the repository, for example:

Below you will see instructions for adding a repository and installing a MariaDB
sudo apt-get install apt-transport-https curl
sudo curl -o /etc/apt/trusted.gpg.d/mariadb_release_signing_key.asc ‘https://mariadb.org/mariadb_release_signing_key.asc’
sudo sh -c “echo ‘deb https://mirror.creoline.net/mariadb/repo/10.10/ubuntu focal main’ >>/etc/apt/sources.list”
Update the package cache:
apt update
Install MariaDB:
apt install mariadb-server
We allow database server autostart and start MariaDB:
systemctl enable mariadb
systemctl start mariadb
Set a password for the DB superuser:
mysqladmin -u root password
* after entering the command, the system will require you to enter the password twice.
Web server
We will use the NGINX web server.
To install it, enter the command:
apt install nginx
Start nginx and allow it to autostart:
systemctl enable nginx
systemctl start nginx
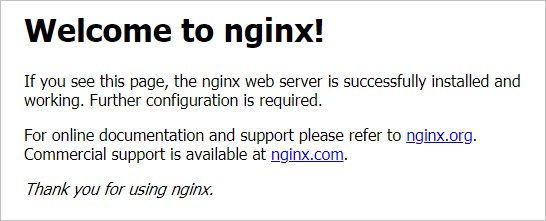
We open a web browser and follow the link http://<server IP address>/ – we should see a welcome window:

VPS Linux
VPS hosting with KVM virtualization
PHP and PHP-FPM
The zabbix interface is developed in PHP. Оur web server must process scripts written in it. Zabbix version 6 requires PHP version 7.2 or higher.
Install php and necessary components:
apt install php php-fpm php-mysql php-pear php-cgi php-common php-ldap php-mbstring php-snmp php-gd php-xml php-bcmath
To configure php, open the file:
vi /etc/php/7.4/fpm/php.ini
* where 7.4 is the PHP version. In your case it might be a different version. You can check with the php -v command.
Edit the following parameters:
date.timezone = “Europe/Berlin”
max_execution_time = 300
post_max_size = 16M
max_input_time = 300
max_input_vars = 10000
* Where:
date.timezone – time zone. In our example, Moscow time is set.
max_execution_time – allowed script execution time. If the script takes longer to run, the system will abort it.
post_max_size – the maximum amount of data transfer using the POST method.
max_input_time – is the time in seconds that PHP should take to parse GET and POST inputs.
max_input_vars – limited number of input variables that can be passed to the server in one request.
Allow php-fpm to run and restart it:
systemctl enable php7.4-fpm
systemctl restart php7.4-fpm
NGINX + PHP
In order for NGINX to process PHP, open the configuration file:
vi /etc/nginx/sites-enabled/default
In the location section, add the index parameter:
index index.php;
Inside the server section, add the following:
location ~ \.php$ {
set $root_path /var/www/html;
fastcgi_buffer_size 32k;
fastcgi_buffers 4 32k;
fastcgi_pass unix:/run/php/php7.4-fpm.sock;
fastcgi_index index.php;
fastcgi_param SCRIPT_FILENAME $root_path$fastcgi_script_name;
include fastcgi_params;
fastcgi_param DOCUMENT_ROOT $root_path;
}
* where /var/www/html is the root path for storing scripts; /run/php/php7.4-fpm.sock is the path to the php-fpm socket file (the exact location of the file can be found in the configuration file /etc/php/7.4/fpm/pool.d/www.conf).
Checking nginx settings:
nginx -t
And reload it:
systemctl restart nginx
Create index.php with the following content:
vi /var/www/html/index.php
<?php phpinfo(); ?>
Open a web browser and follow the link http://<server IP address>/ – now we should see a summary of PHP and its settings.
The web server is ready to work with Zabbix Web.
Installing and configuring the Zabbix server
Let’s move on to installing the Zabbix server itself.
Installation
First, let’s install the repository of the latest version of Zabbix. To do this, go to the page https://repo.zabbix.com/zabbix/ and go to the section with the latest package version – then go to ubuntu/pool/main/z/zabbix-release/ – copy the link to the latest release version:
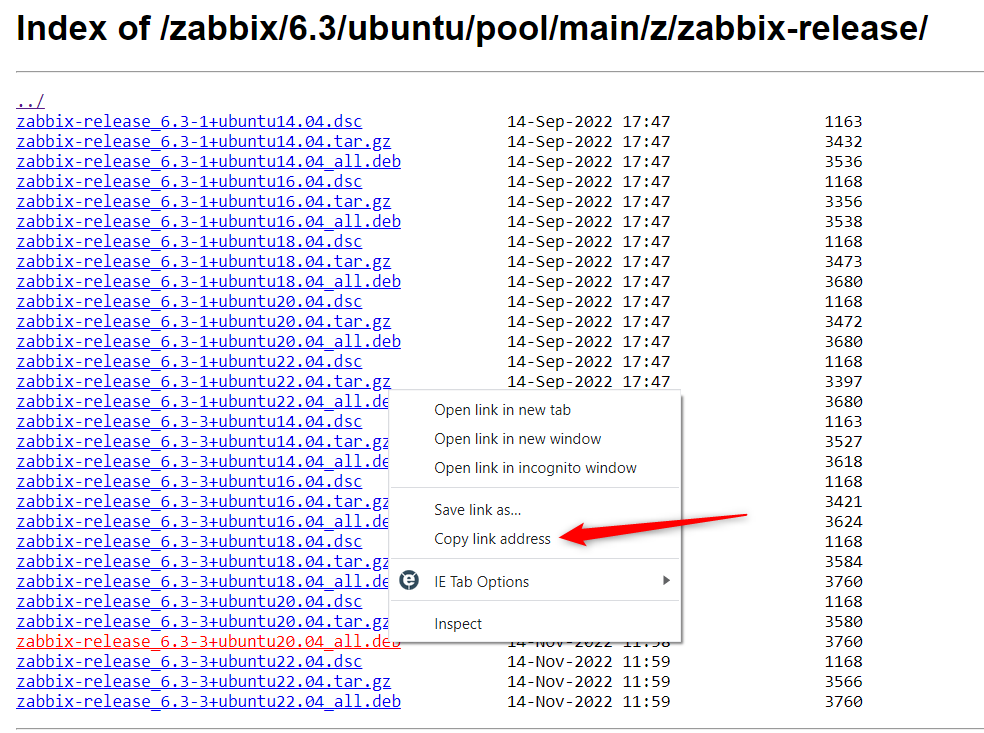
Please note that you need to copy the link to the file for your version of Ubuntu – in our example it is 20.04. You can view your version of the operating system with the command:
cat /etc/os-release | grep VERSION_ID
Download the repository file with the command:
wget https://repo.zabbix.com/zabbix/6.3/ubuntu/pool/main/z/zabbix-release/zabbix-release_6.3-3%2Bubuntu18.04_all.deb
Install it:
dpkg -i zabbix-release_*.deb
Update package lists:
apt update
Install the server by entering the command:
apt install zabbix-server-mysql zabbix-frontend-php zabbix-get zabbix-sql-scripts
Database setup
We enter the shell for entering sql commands:
mysql -uroot -p
We create a database:
> CREATE DATABASE zabbix DEFAULT CHARACTER SET utf8 DEFAULT COLLATE utf8_bin;
* we have created a zabbix database.
Create a user to connect and work with the created database:
> GRANT ALL PRIVILEGES ON zabbix.* TO zabbix@localhost IDENTIFIED BY ‘zabbixpassword’;
* in this example, we have created a zabbix user with access to the zabbix database and the password zabbixpassword.
Exit the sql shell:
> \q
As part of zabbix, there is a ready-made schema for the MySQL / MariaDB or postgreSQL DB. In our case, we need MySQL.
To apply the scheme, go to the directory:
cd /usr/share/zabbix-sql-scripts/mysql
In previous versions of Zabbix, the path to the database dump was /usr/share/doc/zabbix-sql-scripts/mysql. If we could not find the desired directory with the dump, you can try to search with the command:
find / -type f -iname server.sql.gz
Unpack the archive with the database dump:
gunzip server.sql.gz
Restoring the base of their dump:
mysql -u root -p zabbix <server.sql
* after entering the command, the system will ask for a password. You must enter the password that we set after installing MariaDB.
Setting up zabbix
Open the zabbix configuration file
vi /etc/zabbix/zabbix_server.conf
We add a line
DBPassword=zabbixpassword
* we configure the serverl to connect to the database with the password zabbixpassword, which was set when creating the database for zabbix.
And check the following lines:
DBName=zabbix
DBUser=zabbix
* the database and username must be zabbix (as we created in MariaDB).
Create a directory to include configuration files (for some reason, it may not be created during installation):
mkdir /etc/zabbix/zabbix_server.conf.d
Starting zabbix-server
We allow autostart of the monitoring server
systemctl enable zabbix-server
After we start the zabbix server itself
systemctl start zabbix-server
Setting up nginx
When installing zabbix-web, the files are copied to the /usr/share/zabbix directory. Our web server works with the /var/www/html directory.
To change it, open nginx config file:
vi /etc/nginx/sites-enabled/default
Edit the root and set $root_path parameters:
root /usr/share/zabbix
location ~ \.php$ {
set $root_path /usr/share/zabbix;
}
Restart nginx
systemctl restart nginx
Completion of Zabbix server installation
Open a browser and navigate to http://<server IP address>/ – the Zabbix Web installation page will open.
Select the desired installation language and click on Next Step
If the list of languages does not contain the one we need, set the locales:
dpkg-reconfigure locales
And restart the PHP handler, in our case:
systemctl restart php7.4-fpm
Reload the installation page and select the desired language.
In the next window, we carefully look at the results of checking our web server – on the right we should see everything OK. If this is not the case, check the settings and fix the warnings and errors, then restart the F5 page to re-check the settings.
When all the results are OK, click on Next Step
In the next window, we leave the database connection settings as they are – we additionally enter the password that was set when creating the zabbix user. Then click Next Step:
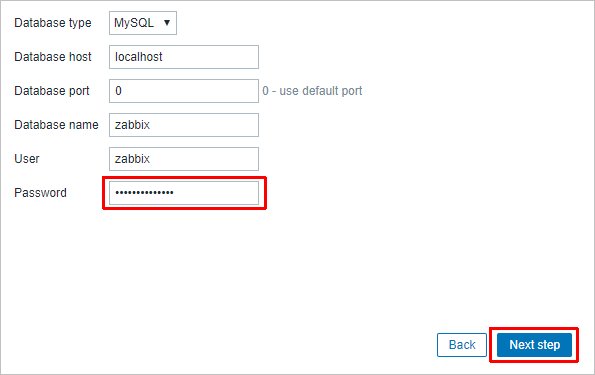
Enter the password for the Zabbix user
* in our case, the password was zabbixpassword;
In the next window, leave everything as it is:
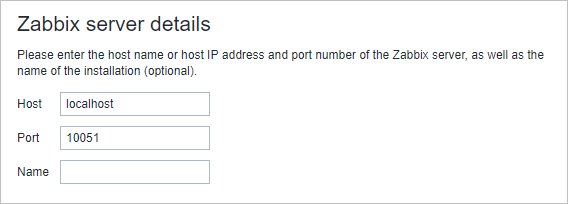
… and click Next Step.
In the last window, we check the settings and click Next Step.
Installation is completed – click Finish
In the window that opens, enter the Admin login and the password zabbix (by default).
Zabbix agent
As an example, let’s install zabbix agent on our server. We will also set up an encrypted connection between the server and the agent.
Installing and connecting the agent
As we have already installed the repository, the agent is installed with the command:
apt install zabbix agent
Let’s open the configuration file:
vi /etc/zabbix/zabbix_agentd.conf
Edit the following option:
Server=127.0.0.1
* in this example, we specify the Zabbix server to the agent – we can specify its name or IP address.
We allow autostart of the agent and restart it:
systemctl enable zabbix-agent
systemctl restart zabbix-agent
Go to the server control panel. Open Monitoring – Hosts. We should see a single Zabbix Server node.
And on the right should be the ZBX availability status:

The agent is up and running.
Enable Encryption
To secure data transfer between the server and the agent, set up encryption using the PSK key.
On the agent, open the configuration file:
vi /etc/zabbix/zabbix_agentd.conf
Change 4 options:
TLSConnect=psk
TLSAccept=psk
TLSPSKIdentity=PSK 001
TLSPSKFile=/etc/zabbix/agent_key.psk
Generate the key:
openssl rand -hex 32 > /etc/zabbix/agent_key.psk
Let’s see its contents:
cat /etc/zabbix/agent_key.psk
Save because we will need it.
Restarting the agent:
systemctl restart zabbix-agent
Go to the Zabbix web control panel. In the list of Hosts click on our server with the agent installed.

Go to the Encryption tab. We select the connection with PKS, check the box for PSK only, enter the identifier (which was set when configuring the agent in the TLSPSKIdentity parameter), enter the key itself, which was generated in the agent console.
Click Update to apply the settings.
After a couple of minutes, our connection state with the agent should be something like this:
Encryption is set.