Before you can connect to the server, you need to create an SSH key.
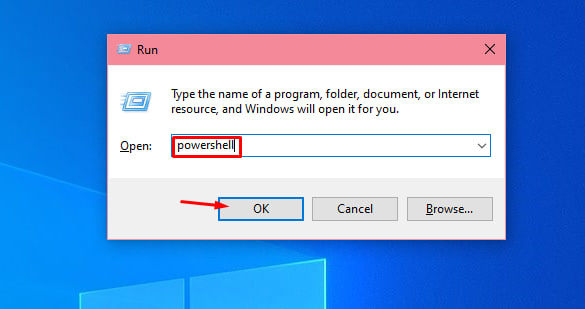
Press Win + R, type: powershell
Click OK.
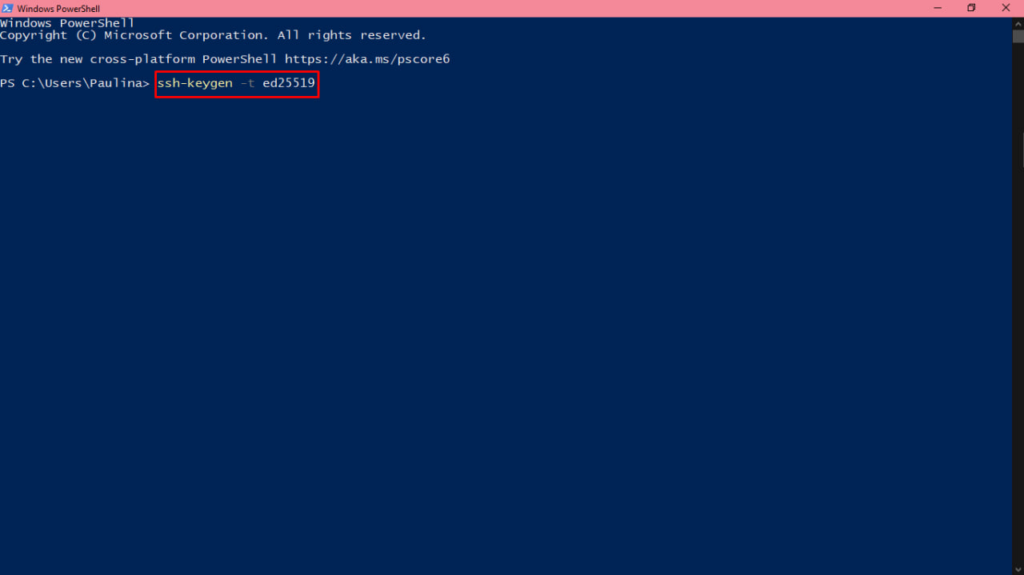
In the PowerShell that opens, run the command: ssh-keygen -t ed25519
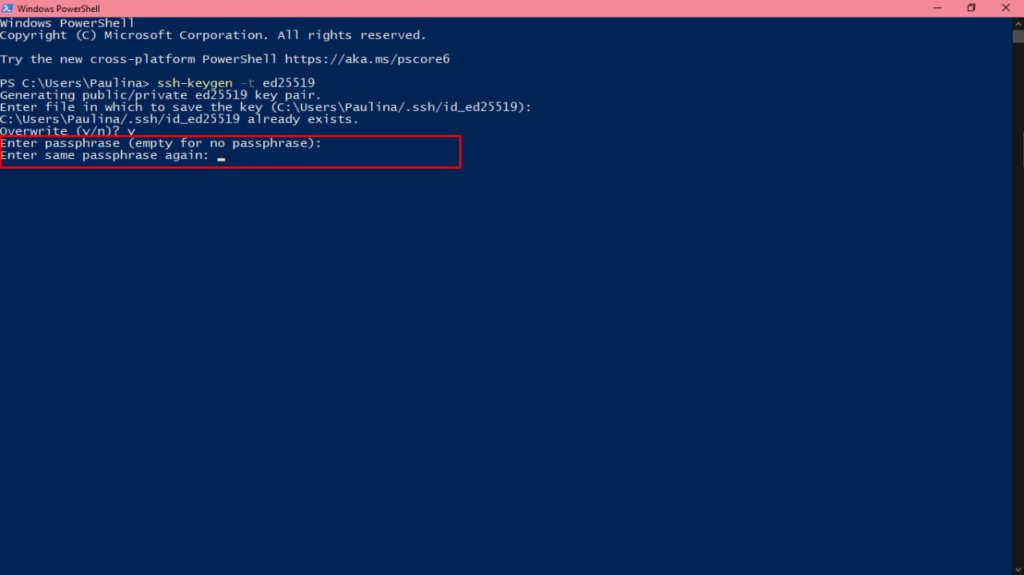
When prompted:
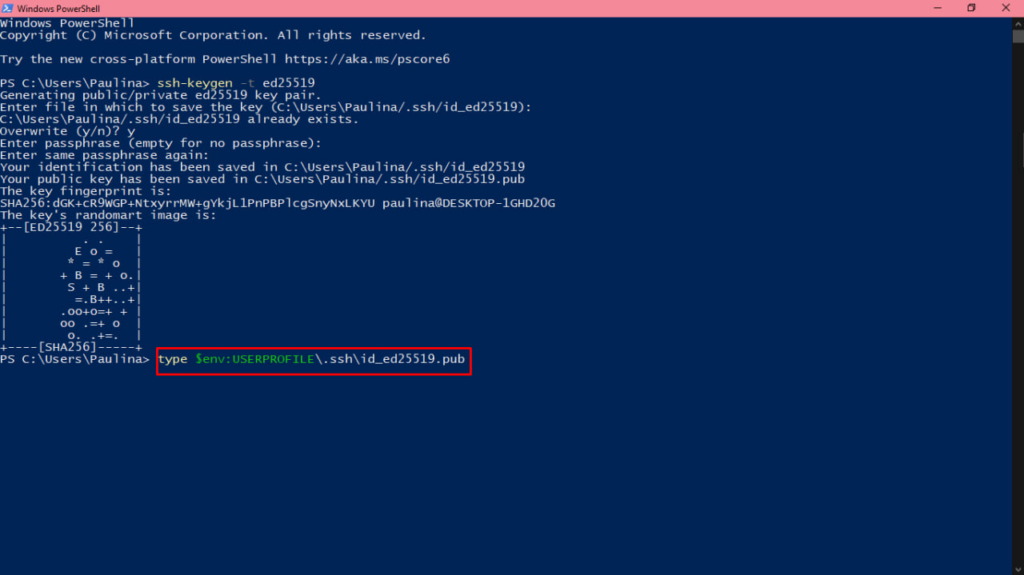
Upon completion, two files will be created:
To display the public key, run the command: type $env:USERPROFILE.sshid_ed25519.pub
The following string will be displayed: ssh-ed25519 AAAA….
Copy this string in its entirety – this is your public SSH key.
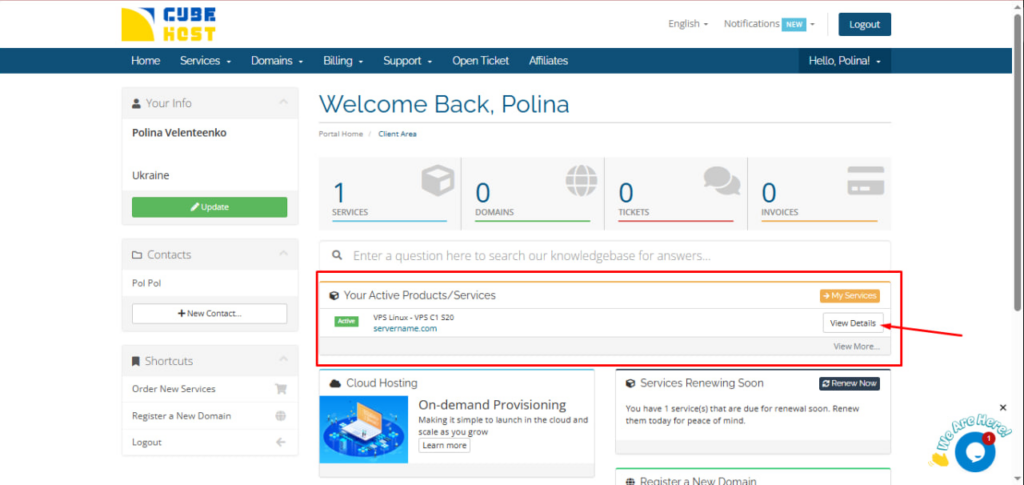
Authorize in the Cube-Host client panel.
Under Your Active Products/Services, click View Details against your VPS.
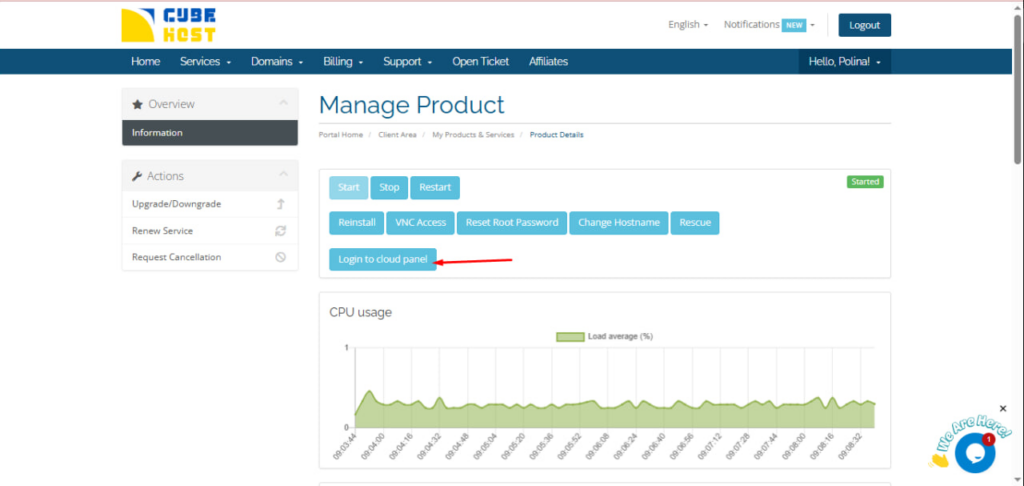
On the service management page, click Login to cloud panel.
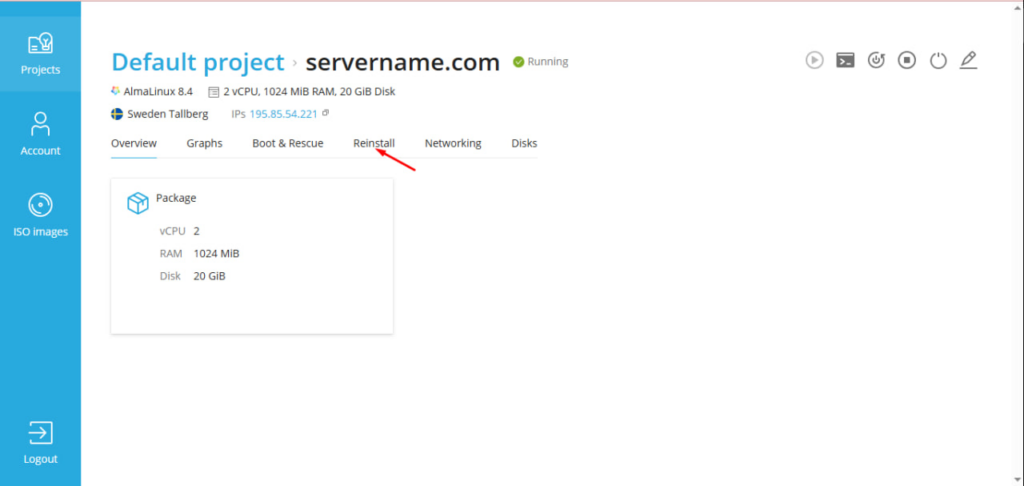
Open Default project.
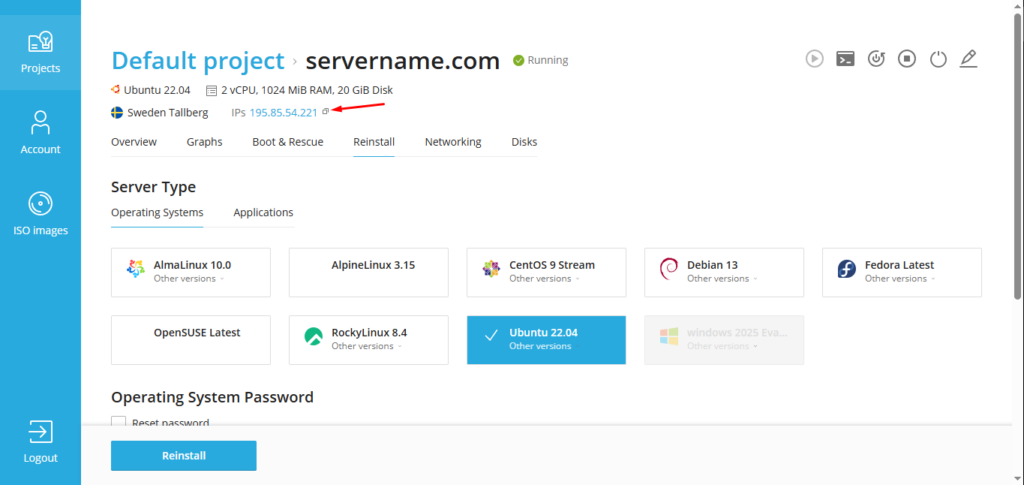
Click on the desired server (for example, servername.com).
Open the Reinstall tab .
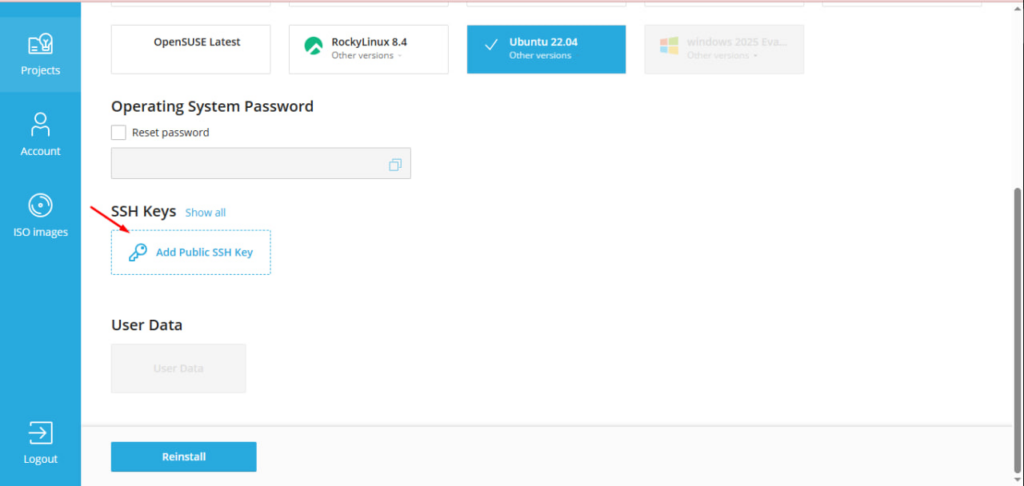
In the SSH Keys section, click Add Public SSH Key.
In the window that opens:

IMPORTANT: The SSH Key is added when the server is reinstalled. If the server is already deployed, you must Reinstall to apply the key.
The IP address is displayed in the Cloud Panel next to the server.
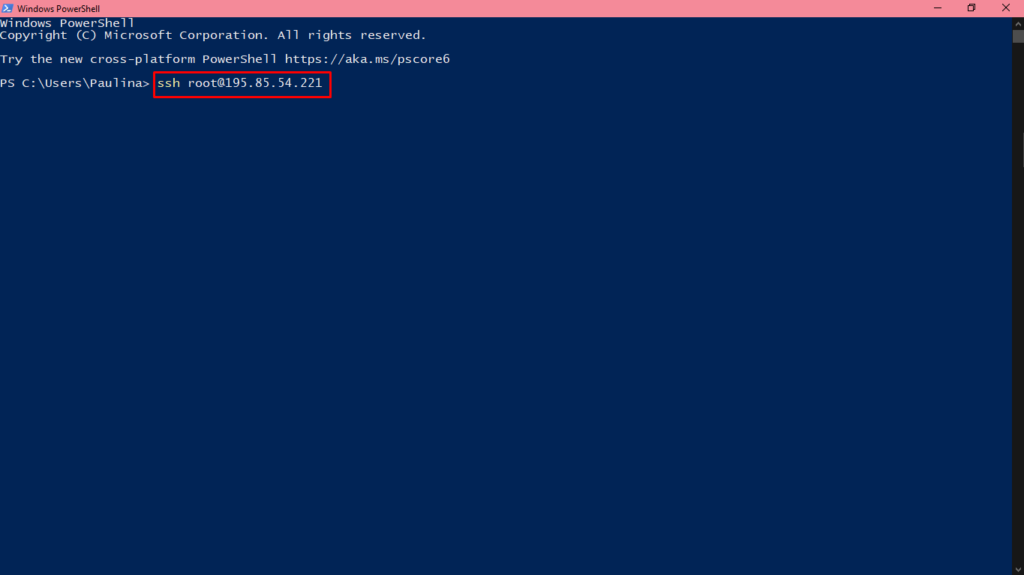
In PowerShell, run the command: ssh root@IP_ADDRESS
Example: ssh root@192.0.2.10
If you want to explicitly specify a key: ssh -i $env:USERPROFILE.sshid_ed25519 root@IP_ADRES
When connecting for the first time, the system may prompt you:
Are you sure you want to continue connecting (yes/no)?
Enter: yes
After successful authorization, you will have access to the server command line.